The 4×4 Rubik’s Cube or the Rubik’s Revenge is a level higher than that of the classic 3×3 Rubik’s Cube. Though it might seem quite more complex than the classic 3×3 Cube, solving the 4×4 Cube is quite similar with only a few additional algorithms and notations to learn.
One of the easiest methods of solving the 4×4 Rubik’s Revenge is the reduction method. This method involves reducing the cube such that it can be solved like a 3×3 Rubik’s Cube. It requires only two steps – solving the centrepieces and pairing up the edge pieces. However, before we divulge into the steps, it is important to understand some of the notations based on which you can perform the needed algorithms.
Notations
| Front face (the side facing you) | F |
| Inner front face | f |
| Back face (the side away from you) | B |
| Inner back face | b |
| Left face | L |
| Inner left face | l |
| Right face | R |
| Inner right face | r |
| Up face | U |
| Inner up face | u |
| Down face | D |
| Inner down face | d |
| Wide turn – 2 layers | w |
Here is an example to help you understand the notations better.
R (Outer Face) Rw (Wide turn – 2 Layers) r (inner face)
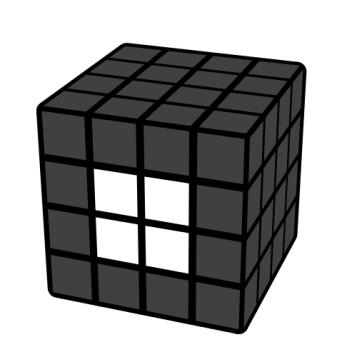
Step 1: Solving the centres
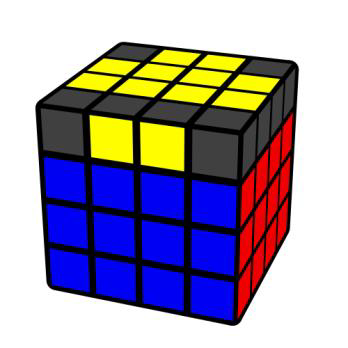
The first step to solve 4×4 is to solve the centrepieces. Unlike a 3×3 Rubik’s Cube, the Rubik’s Revenge does not have any fixed centrepieces. There are four centrepieces of each colour, and you should aim at solving the centres in their correct relative position.
To get started, you need to solve two centres onto opposite faces from one another. This should be an intuitive step, and therefore, you need to figure it out on your own. Use this step to get comfortable with the movement of the pieces and layers of the cube. However, it is important to solve them in their correct position. This means that the white centre should be opposite yellow, blue opposite green, and red opposite orange.
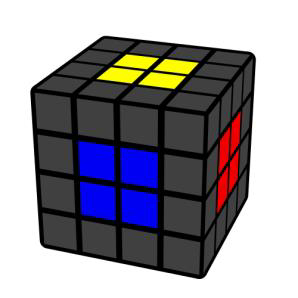
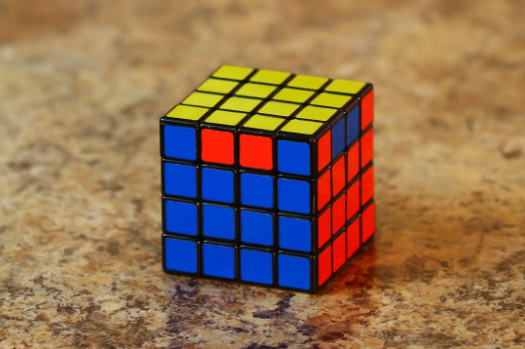
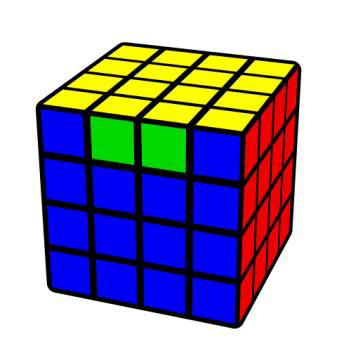
The image shows the correct placement of the yellow centre relative to the red and blue centrepieces. This is what your 4×4 cube should look like once you solve the centrepieces intuitively.
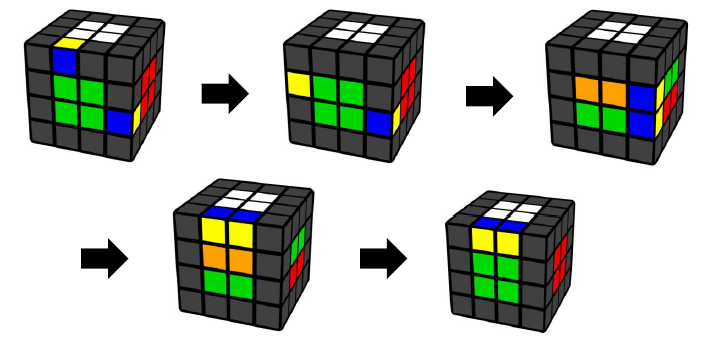
Step 2: Pairing the edges
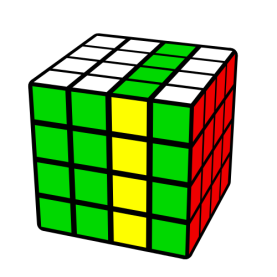
The next step in the reduction method is to pair up the matching edge pieces. There will be two edge pieces for every combination of two colours on the cube – except the opposites.
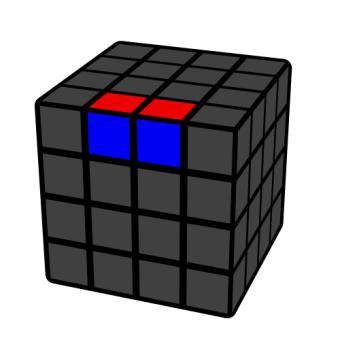
You should aim at pairing them all up, as shown in the image above.
To do this, you need to turn the outer faces of the cube so that you can place two individual edge pieces on the front left and front right faces ensuring that they are in different layers. Once done you need to then move these solved edges to the top layer.
When you move it to the top layer, you need to be careful that the centrepieces are left unharmed. You can consider using two algorithms here that can move an edge from the front right slot to the top layer.
Algorithm 1:
| R U R’ | 1. Rotate the right face clockwise 2. Rotate the up face clockwise 3. Rotate the right face counter clockwise |
Algorithm 2:
| R U’ R’ | 1. Rotate the right face clockwise 2. Rotate the up face counter clockwise 3. Rotate the right face counter clockwise |
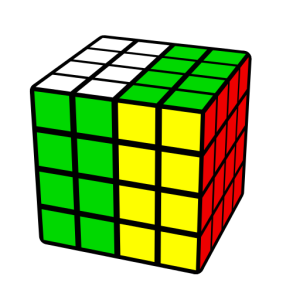
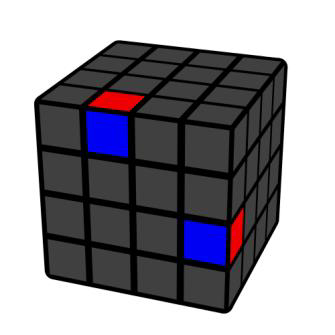
You need to keep performing these algorithms until all the edges have been paired up correctly. If you come across a case wherein you have two edges left to solve, then hold your cube as displayed in the image below and perform the algorithm given.
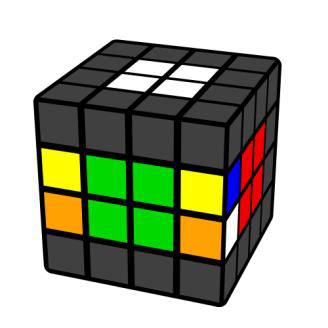
Algorithm:
| Uw’ R U R’ F R’ F’ R Uw | 1. Rotate the up face wide turn counter clockwise 2. Rotate the right face clockwise 3. Rotate the up face clockwise 4. Rotate the right face counter clockwise 5. Rotate the front face clockwise 6. Rotate the right face counterclockwise 7. Rotate the front face counter clockwise 8. Rotate the right face clockwise 9. Rotate the up face wide turn |
Step 3: Solve like a 3×3
Now that you have solved all the centres and paired up the edges, you can solve this 4×4 Rubik’s Revenge like a 3×3 Cube. The solved centres of the 4×4 are equivalent to a single centre on a 3×3. Similarly, each pair of 4×4 edge pieces is equivalent to a single edge on a 3×3 cube. The corner pieces are equivalent on both cubes. And hence, you can now solve it like a 3×3 until the last layer.
OLL and PLL Parities
When you reach the last layer of the 4×4, there are two possible parity cases. A parity is a situation that can occur during the 3×3 stage, which is not ideally possible on a 3×3 cube.
The first parity is called the OLL (Orientation of Last Layer), and it occurs when there is an odd number of oriented edge pieces on a cube. You can use this algorithm to fix the OLL parity.
Algorithm
| Rw U2 Rw U2 Rw U2 Rw’ U2 Lw U2 Rw’ U2 Rw U2 Rw’ U2 Rw’ | 1. Rotate the right face wide turn clockwise 2. Rotate the up face clockwise twice 3. Rotate the right face wide turn clockwise 4. Rotate the up face clockwise twice 5. Rotate the right face wide turn clockwise 6. Rotate the up face clockwise twice 7. Rotate the left face wide turn clockwise 8. Rotate the up face clockwise twice 9. Rotate the right face wide turn counter clockwise 10. Rotate the up face clockwise twice 11. Rotate the right face clockwise wide turn 12. Rotate the up face clockwise twice 13. Rotate the right face counter clockwise wide turn 14. Rotate the up face clockwise twice 15. Rotate the right face counter clockwise wide turn |
The second parity is the PLL (Permutation of Last Layer) parity which occurs when there is an odd number of edge or corner swaps. To fix this parity, you need to use the Algorithm stated below to swap the front and back edge pairs.
Algorithm
| r2 U2 r2 Uw2 r2 Uw2 U2 | 1. Rotate the inner right face clockwise twice 2. Rotate the upright face clockwise twice 3. Rotate the inner right face clockwise twice 4. Rotate the up face wide turn clockwise twice 5. Rotate the inner face clockwise twice 6. Rotate the up face wide turn clockwise twice 7. Rotate the up face clockwise twice |
Conclusion
That’s all! You have now solved the 4×4 Rubik’s Revenge! All you need to do is keep practicing until all the algorithms are intuitive and you can solve it without any guide! Happy Cubing!