During this COVID-19 pandemic, it is important to wear a face mask to protect yourself and others from this contagious virus. All must take this necessary step for the safety of all. One of the best ways to ensure your safety is to never step outside of your house without wearing a face mask.
You can use this face mask as a fashion accessory. By following the right techniques, you can look cool and stay safe as well. You can customize your face mask on your own and look different from others.
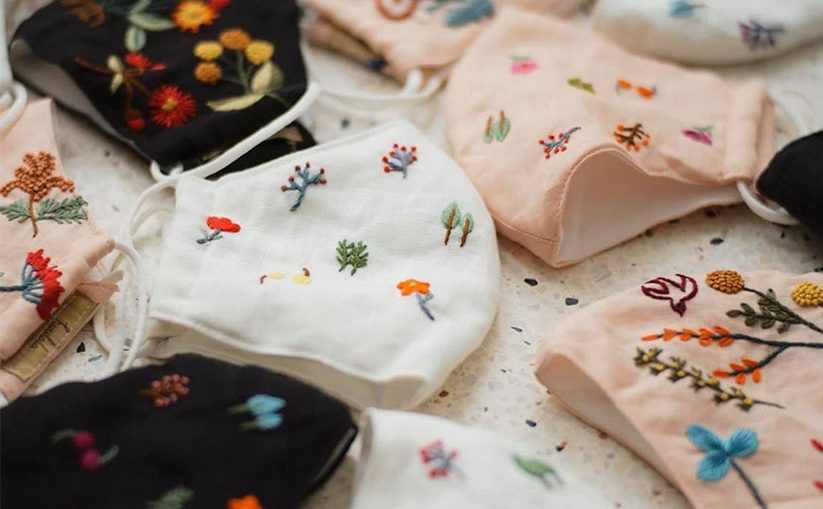
The beautiful, stylish, cool, and attractive face masks can help you to look different from others. You can customize your face mask by either doing painting or embroidery. Here, in this article, we are going to discuss various tips and tricks to embroider your face mask.
First of all, you need to collect the supplies that your need for the face mask embroidery: Tape, Scissors, Snips, Tape measure, Elastic cord for the straps of the mask, and Fabric. Now, have a look at the step-by-step guide for embroidering the face mask:
Step 1: Hoop One Sheet
This face mask embroidery project is an in-the-hoop project. Therefore, you do not need any type of sewing machine. The stitches of embroidery will hold your mask together. You just need to hoop one sheet of tearaway backing.
After that, you can simply place your hoop in your embroidery machine. To accomplish this project, you need an embroidery machine. You can also take the help of professionals such as custom masks Toronto contractors.
Step 2: Download Digital File Of Design
You should create the digital file of the design that you want to create on your face mask. You should download the digital file of the design in a format that your embroidery machine supports. Now, move this digital file on your machine and select the hoop size as per the size of your face mask.
Step 3: Select Color and Frame Out
Once you have transferred the digital file on the embroidery machine, then you should select the color and “frame out” for the first two steps. The color sequence screen provides you with a wide range of options to select the required color.
Whenever the design will move to the color stop, then the hoop will start moving away from the needle. It allows you to place the next piece of face mask inside the hoop.
Step 4: Outlining
You should lock the machine for a minute and make sure that your design will perfectly fit inside the boundaries of the hoop.
If you are sure that the size of your design perfectly fits inside the hoop, then you can start trace stitches. It will help to embroider the outline of your face mask. If the hoop of your designer frames out, then you will get to know the right shape and size of the face mask.
Step 5: Take Measurement
You should take measurements of the face mask with the measuring tape. Once you have taken the proper measurement of your face mask, then you should cut out the piece of fabric. Make sure that the size of the fabric is large than the design that you want to embroider.
You should place the fabric over the trace stitch. Make sure that the design is facing an outward direction. Now, press the start button and you should make sure that your embroidery machine doubles Place the main fabric on top of the trace stitch with the design facing up. The embroidery machine will stitch both fabrics together.
Step 6: Measure The String Length
You should properly measure the length of strings and make sure they are capable to tie around the head. Stitch the straps at the corner of the face masks.
Step 7: Additional Piece Of Fabric
You should add the second piece of fabric to your face mask. This second piece will act as the holder for the filter. You should cut the second piece of the same size as that of the first. The custom embroidery Toronto professionals help you to stitch a perfect face mask.
Step 8: Stitch Second Fabric
You should cut the fabric into two halves to get two identical strips. You should place the two new strips of fabric at the top of your face mask. While placing these new strips, you should make sure that all these pieces of fabric are overlapping each other.
Overlapping fabric on each other is not a big issue because the full piece of fabric has extra two inches. It means you have more fabric for doing little adjustments. Finally, put the whole mask together and make it ready for wearing.
These are few steps to create beautifully embroidered face masks.